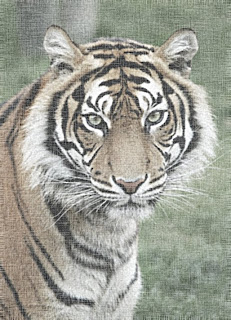
Canvas Effect
Go to File>Open, and find a picture you would like to use.
1. Duplicate the layer by Ctrl+J
2. Desaturate the image by Image>Adjustments>Desaturate and set the opacity to 70%
3. Merge both layers so you only have the one background layer.
4. Then go Filter>Noise>Add noise, leave everything the same but set amount to 10%, make sure the monochromatic box is checked.
5. Apply Filter>Blur>Gaussian Blur, leave everything the same but set Radius to 1.
6. Then sharpen the photo a bit with Filter>Sharpen>Smart sharpen, leave everything the same but set Amount=155%, and Radius=2.3 pixels
7. Now create a blank new layer by clicking on the “New Layer” button at the bottom of the layers box, then fill that layer with black, then Filter>Noise>Add Noise leave the settings the same but change Amount=120%
8. Then mess with layer mode & opacity/fill. I use the layer mode “Screen” with the opacity set to 50%
9. Now, duplicate noise layer with Ctrl+J and hide the copy (click on the eye, which indicates layer visibility). Go to lower layer and apply Filter>Blur>Motion Blur, put settings to Angle=90 degrees, and Distance=25 pixels.
10. Now apply Filter>Sharpen>Sharpen two times to this layer
11. After go back to the hidden layer and make it visible again by clicking on the eye. Apply Filter>Blur>Motion Blur, and set the Angle=0 degrees, and Distance=25 pixels.
12. Then go Filter>Sharpen>Sharpen two times for this layer too.
13. Go Image>Adjustments>Brightness/Contrast, and set Brightness= -30 and Contrast= +35
14. Finally for a little extra sharpness go Filter>Sharpen>Sharpen just one time for this layer, and then you’re done.
-Ogden Douglas
No comments:
Post a Comment